
In this article, we will focus purely on laying out the structure for our ‘DNA Engine’ project. We will start adding elements and programming them in our next article.
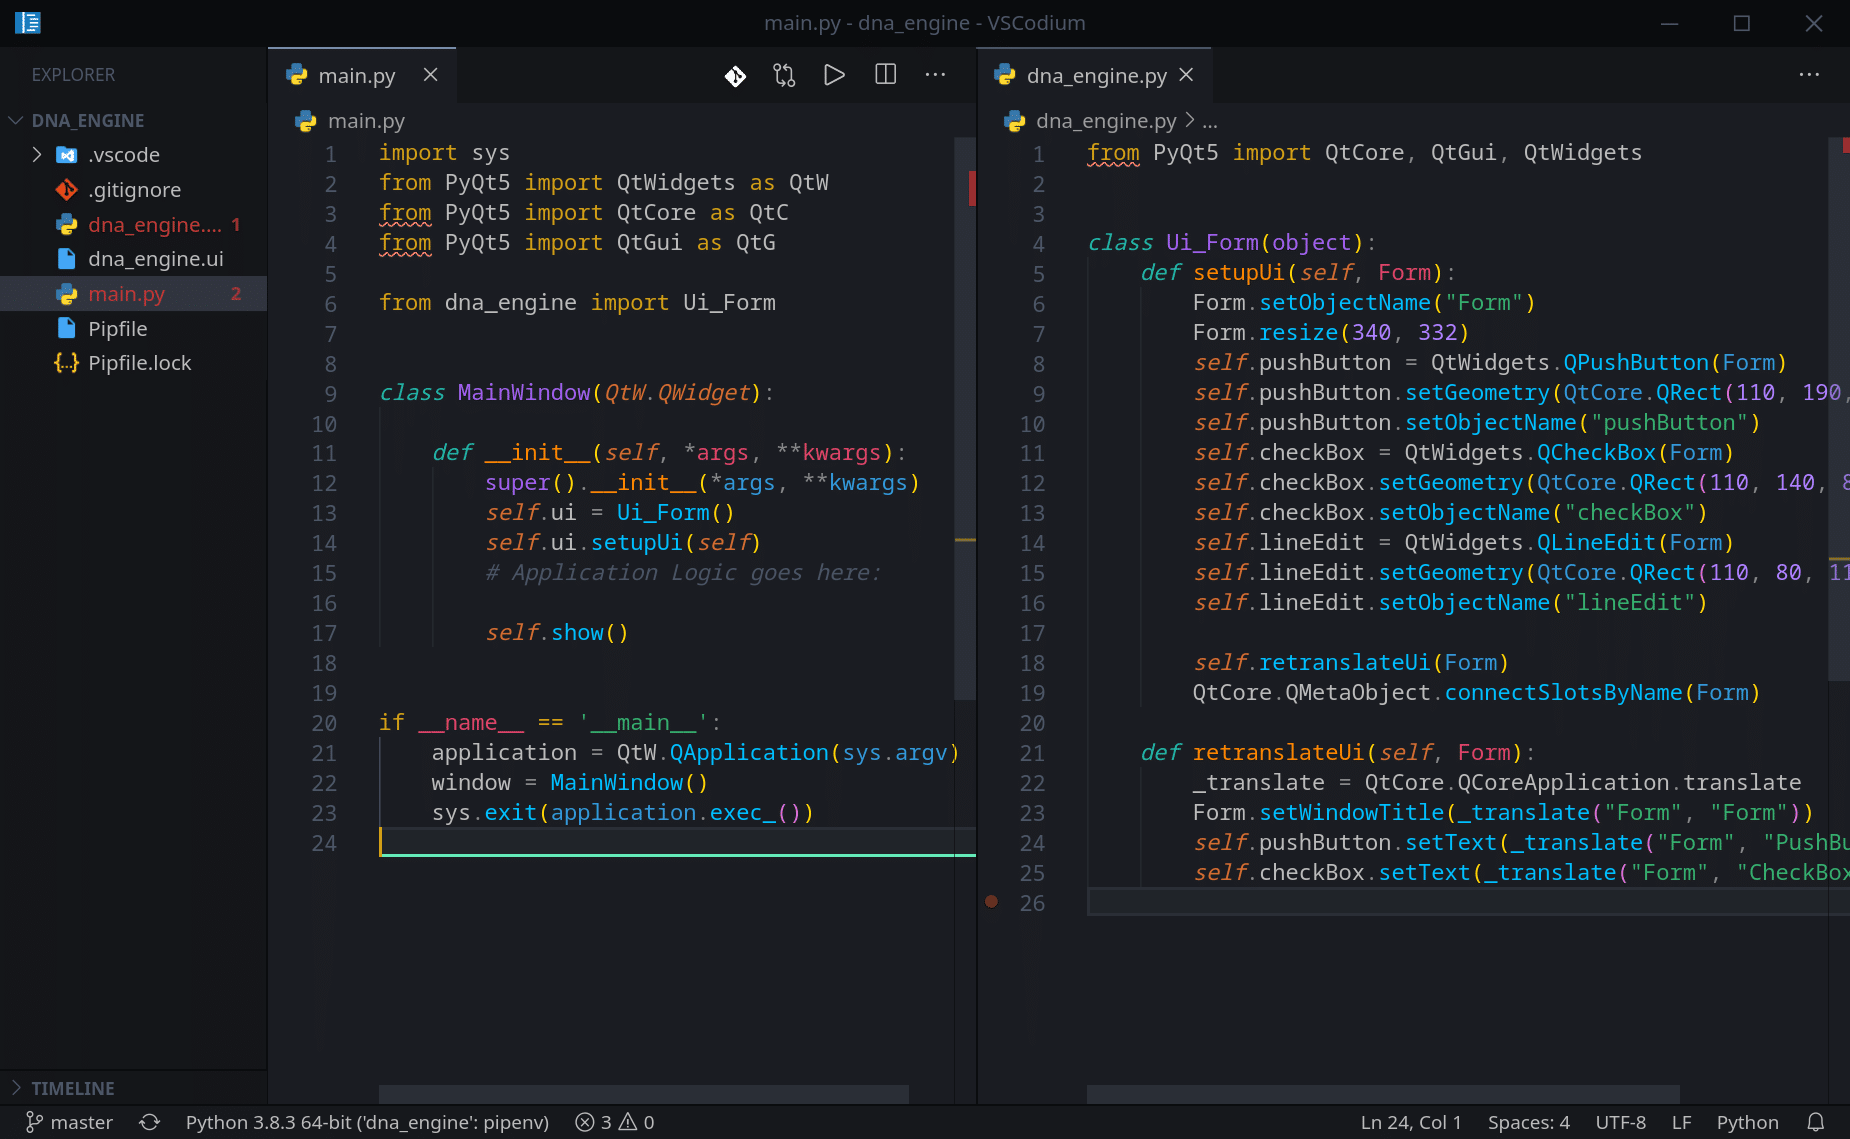
So here is the structure we had up and running last time (Test UI and a Test Class):
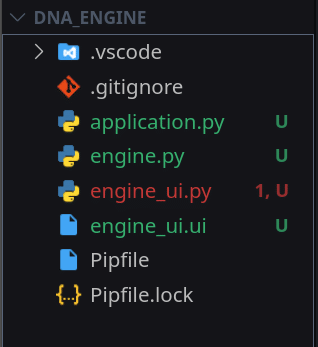
Part 1: File structure.
Now that we have Python Virtual Environment, PyQT module and tools installed and tested, let’s create a new structure for our project.
First, let’s delete the following files from our project (we have used them to test our development environment):
- dna_engine.py
- dna_engine.ui
- main.py
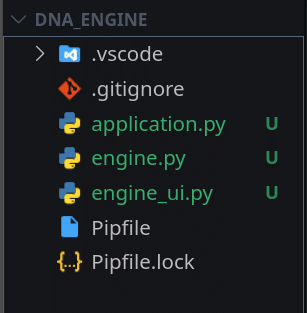
And create three new files:
- application.py – this will be our entry point. The ‘main’ function.
- engine.py – main engine class that will handle and manage the core functionality (more on that as we progress).
- engine_ui.py – ui layout file.
Part 2: Class Template and the ‘main’ function.
Before we create the initial ‘DNAEngine’ class structure, let’s practice by going back to the Qt Designer and creating a new window ‘MainWindow’:
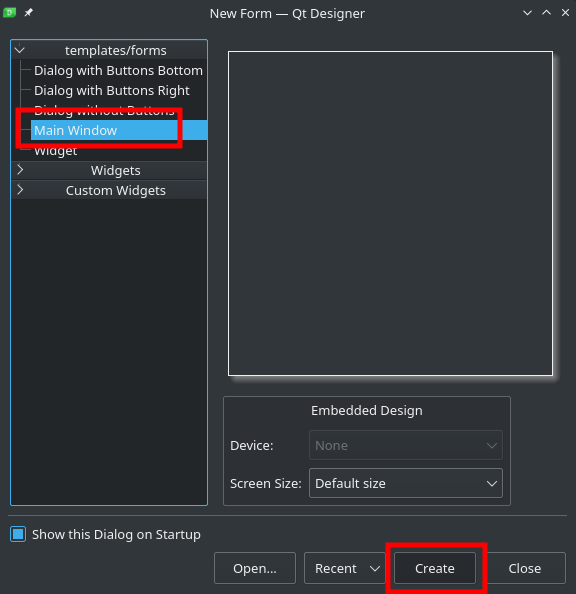
Let’s rename our Window and drop a Button on to it and change its text also:
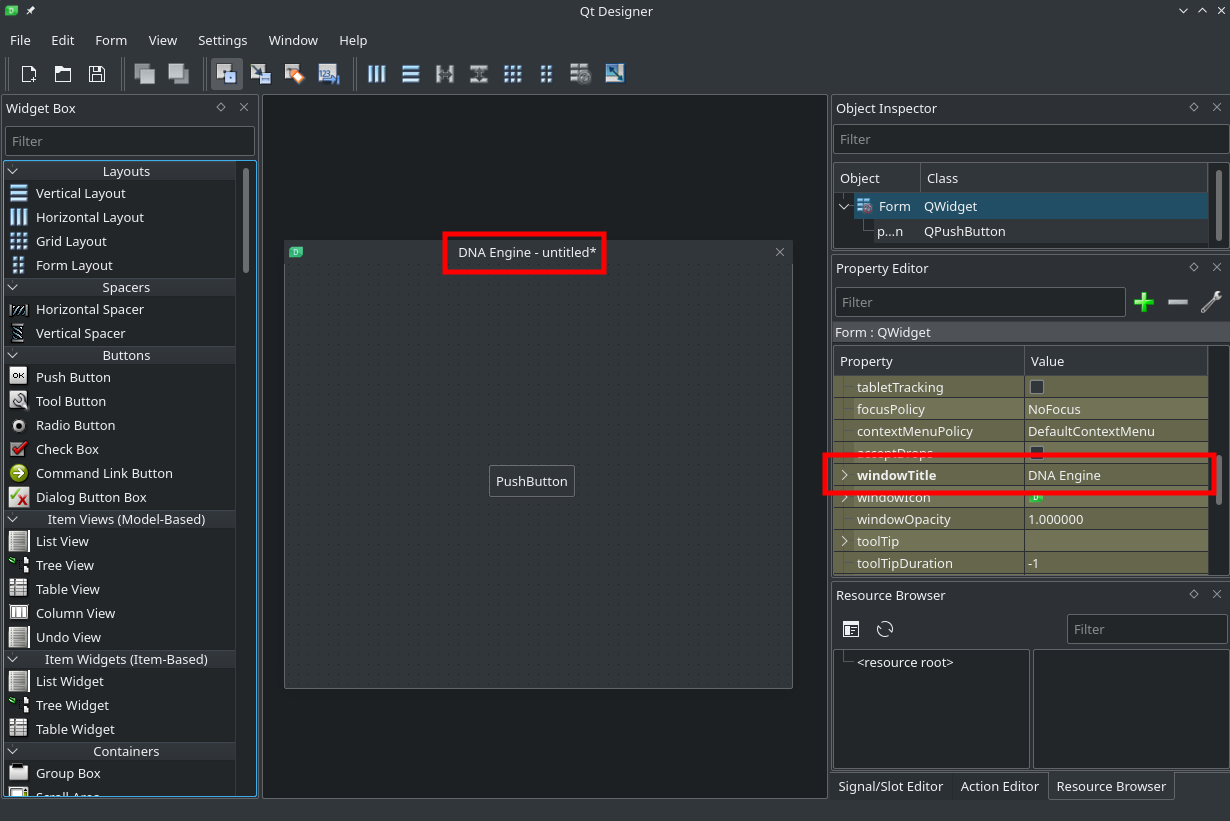
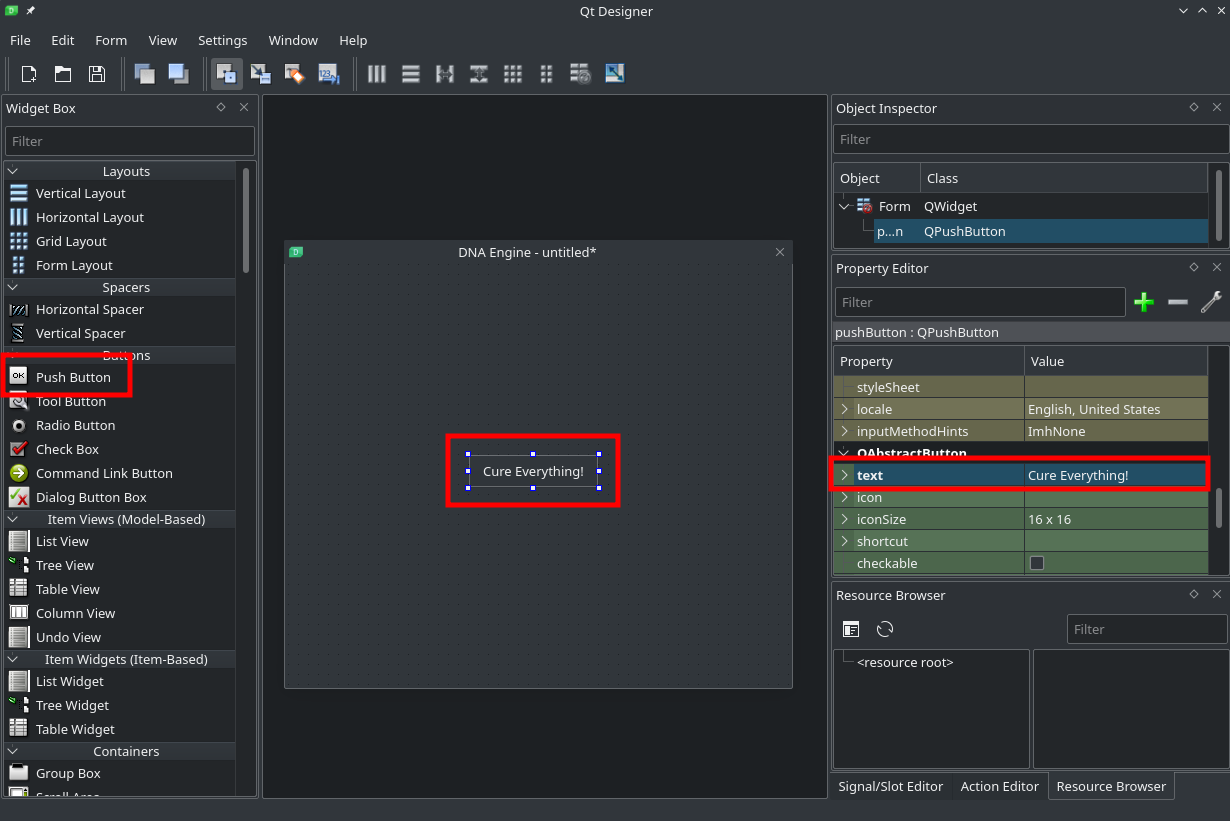
Now save this as a engine_ui.ui file in the root of our ‘DNA_Engine’ folder. Open up your terminal and execute the command we learned in the previous article:
pyuic5 engine_ui.ui -o engine_ui.py
So the final file structure for this article is this:
Now, that we have the ui file converted to a py file, we are ready to create our class, that will include it. Open engine.py file and type/add the following ‘skeleton’ class:
from engine_ui import Ui_MainWindow
from PyQt5 import QtWidgets
import sys


class DNAEngine:
    def __init__(self, *args, **kwargs):
        super().__init__(*args, **kwargs)
        self.app = QtWidgets.QApplication(sys.argv)
        self.MainWindow = QtWidgets.QMainWindow()

    def setup(self):
        self.ui = Ui_MainWindow()
        self.ui.setupUi(self.MainWindow)

    def run(self):
        sys.exit(self.app.exec_())

    def display(self):
        self.MainWindow.show()
My file/class structure and function names will look a lot like a typical Game/Games Engine structure, as 70%+ of my programming experience comes from developing Game Engines.
On the line 1 we include our ui file, and it has just one class, which is Ui_MainWindow.
On the line 2 we include only one module from PyQT5. We will include others as we start using them. This module will allow us to create a window and communicate with it. We also include a standard Python module sys to enable our application/window to ‘talk’ to the operating system.
We call our class DNAEngine, but if you are not interested in bioinformatics direction of this project, feel free to use any other names that fit your project.
The first 4 class methods we will add are very descriptive:
__init__: initialize the class and create an instance of a window/widget.setup: run any setup for UI and load any other configurations.run: start an instance of a class by initializing the event loop.show: show/render the UI.
If you are not familiar with Python’s super() function, I suggest you read this Stack Overflow page.
Now let’s use our class for the first time to “Start Our Engine”. Open application.py file and type/add the following code:
from engine import DNAEngine

if __name__ == "__main__":
    Engine = DNAEngine()
    Engine.setup()
    Engine.display()
    Engine.run()
And this is it! We just import our DNAEngine class from the engine.py file, and call all 4 methods from our class.
The goal here is to have a clean and module design, and easy to read and maintain code.
Now let’s run and test our new setup:
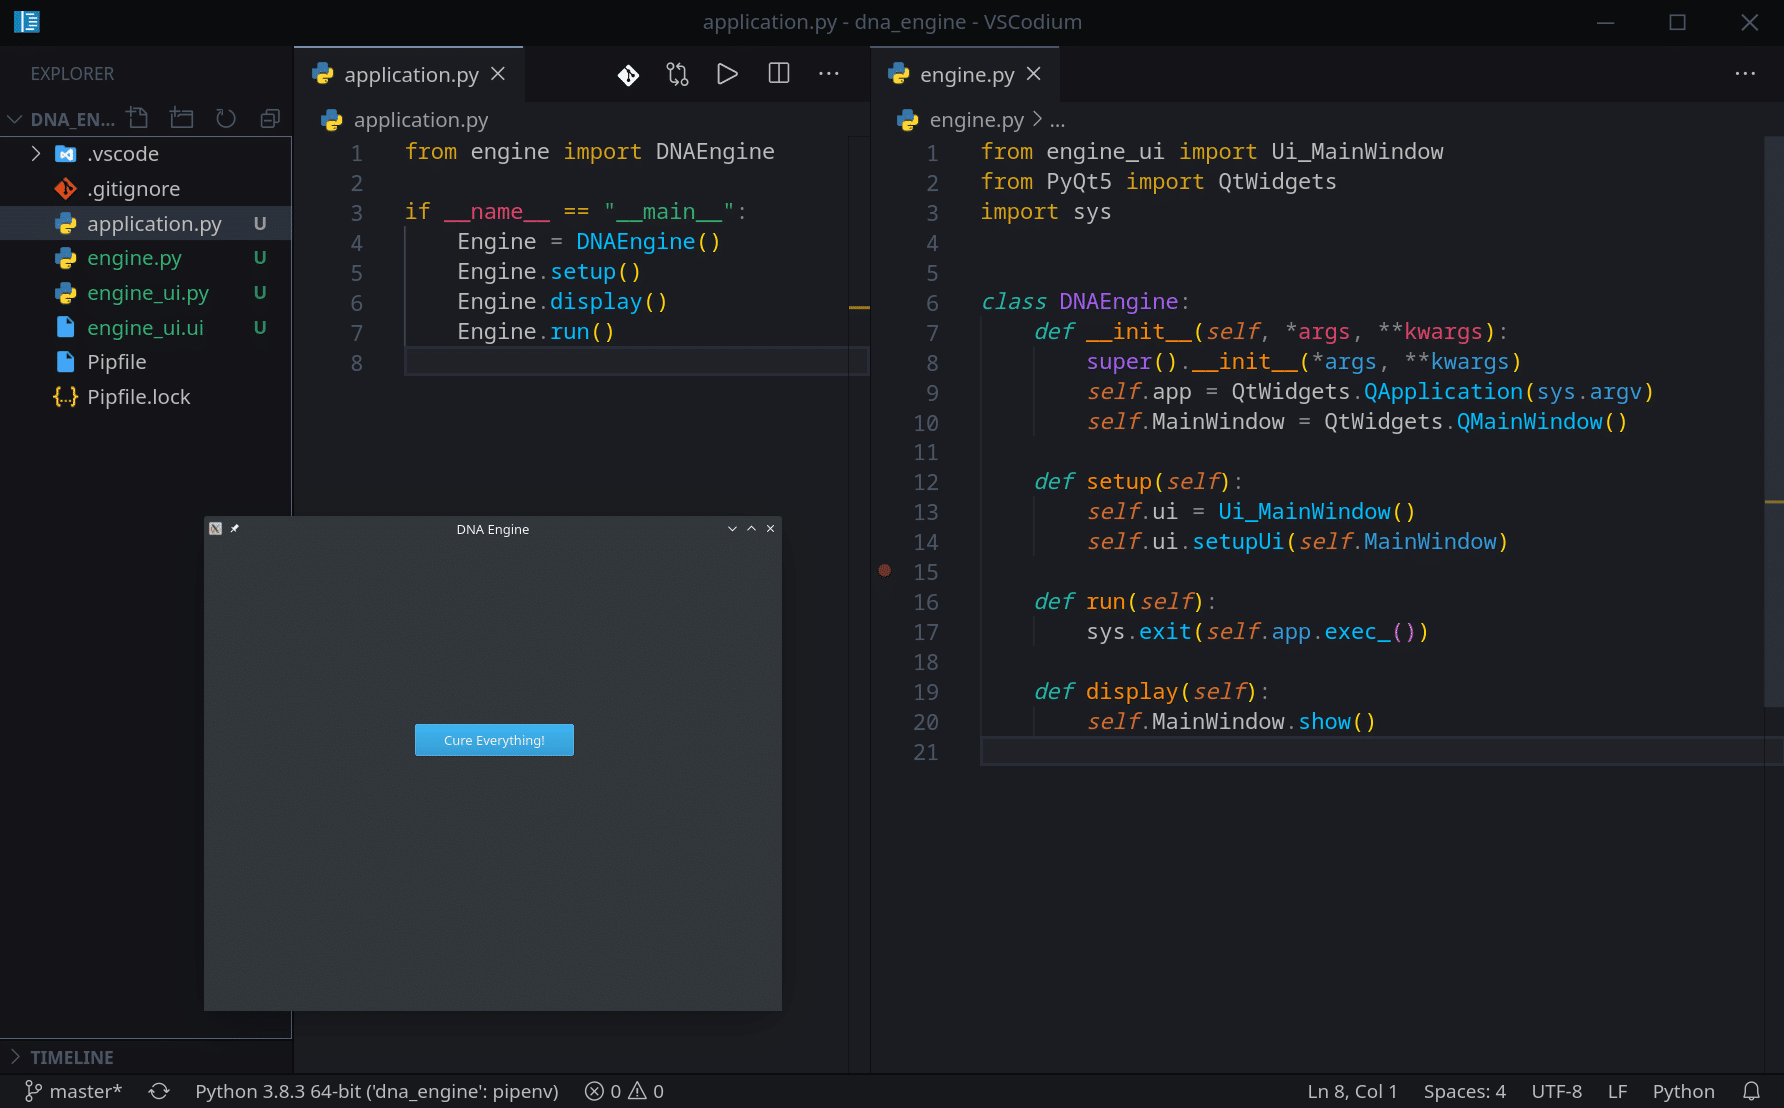
Make sure you are running the project out of the virtual environment we created in the last article.

Awesome! Now, that our project is configured and tested, we are ready to start designing and programming our first UI elements. This is exactly what we will start doing in the next article.
Links:
- PyQT5 + Designer installation and use on Windows Video.
- Alan D Moore’s amazing PyQT and Designer Video.
Also, not required but a highly recommended book by Alan D Moore:
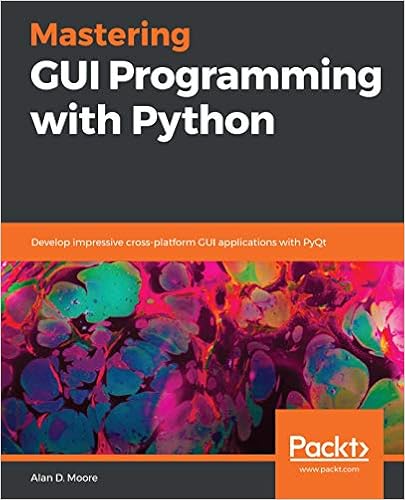
Buy: US / UK
GitLab: https://gitlab.com/RebelCoder/dna-engine-toolkit.git
YouTube playlist for this series:
When is this series coming back! I’m eagerly following along!
Hey! Thank you. This series will continue very soon!