
Hello and welcome to “Bioinformatics Tools Programming in Python with Qt” article/video series. In this series, we will start developing a Qt framework based application using Python programming language.
Qt is a free and open-source widget toolkit for creating graphical user interfaces as well as cross-platform applications that run on various software and hardware platforms such as Linux, Windows, macOS, Android or embedded systems with little or no change in the underlying codebase while still being a native application with native capabilities and speed.
https://en.wikipedia.org/wiki/Qt_%28software%29
This series is semi-connected to the “DNA Toolkit” series, also available on this website. Application code and structure we will be developing here is universal for the most part. It can be applied to any kind of project, but we will focus on a concrete example: adding a GUI (graphical user interface) to a class and a set of functions we developed in “DNA Toolkit” series.
Prerequisites:
- Medium to Advanced Python and OOP knowledge.
- Python 3.7+ configured code editor. (VSCodium Setup)
- Linux preferably as that is what I use, but other OS is fine too as long as you can easily replicate our steps.
While previous Qt framework experience is good to have, it is not necessary as I will guide you though and also link to good resources on the topic.
We will start by setting up PyQt and a virtual environment for our project and run a Test App. After that, we will generate our first UI file and load it into our project.
Part 1: Python, PyQt and pipenv setup
Open a terminal or a cmd and let’s create a project folder called ‘dna_engine‘. Navigate (cd) into that directory and install/activate virtual environment. Commands are listed below:
mkdir dna_engine
cd dna_engine
pipenv install
pipenv shell
If you successfully activated the virtual environment, you should see something like this:
. /home/jurisl/.local/share/virtualenvs/dna_engine-REfk1eAd/bin/activate
(dna_engine) [jurisl@JurisLinuxPC dna_engine]$
Now we need to install a few packages into our virt-env. This can be done with the following command:
pipenv install pyqt5 pyqt5-tools autopep8
And you should see something like this:
Installing pyqt5…
Adding pyqt5 to Pipfile's [packages]…
✔ Installation Succeeded
Installing pyqt5-tools…
Adding pyqt5-tools to Pipfile's [packages]…
✔ Installation Succeeded
Installing autopep8…
Adding autopep8 to Pipfile's [packages]…
✔ Installation Succeeded
- pyqt5 – Qt Framework.
- pyqt5-tools – Qt designer, UI file converter and other tools.
- autopep8 – just a code linter/formatter.
Now we should be ready to test our setup and run a test application.
Part 2: Test application
While in a ‘dna_engine‘ project folder in your terminal window, type one of the following commands to open vscode/vscodium editor in that directory. This will also load a project into a newly opened window.
(dna_engine) [jurisl@JurisLinuxPC dna_engine]$ vscodium ./
OR
(dna_engine) [jurisl@JurisLinuxPC dna_engine]$ vscode ./
OR
(dna_engine) [jurisl@JurisLinuxPC dna_engine]$ codium ./
OR
(dna_engine) [jurisl@JurisLinuxPC dna_engine]$ code ./
If you are using a different editor, you can try typing the name of your editor with ./ appended or just adding our project folder into your editor by hand (drag and drop).
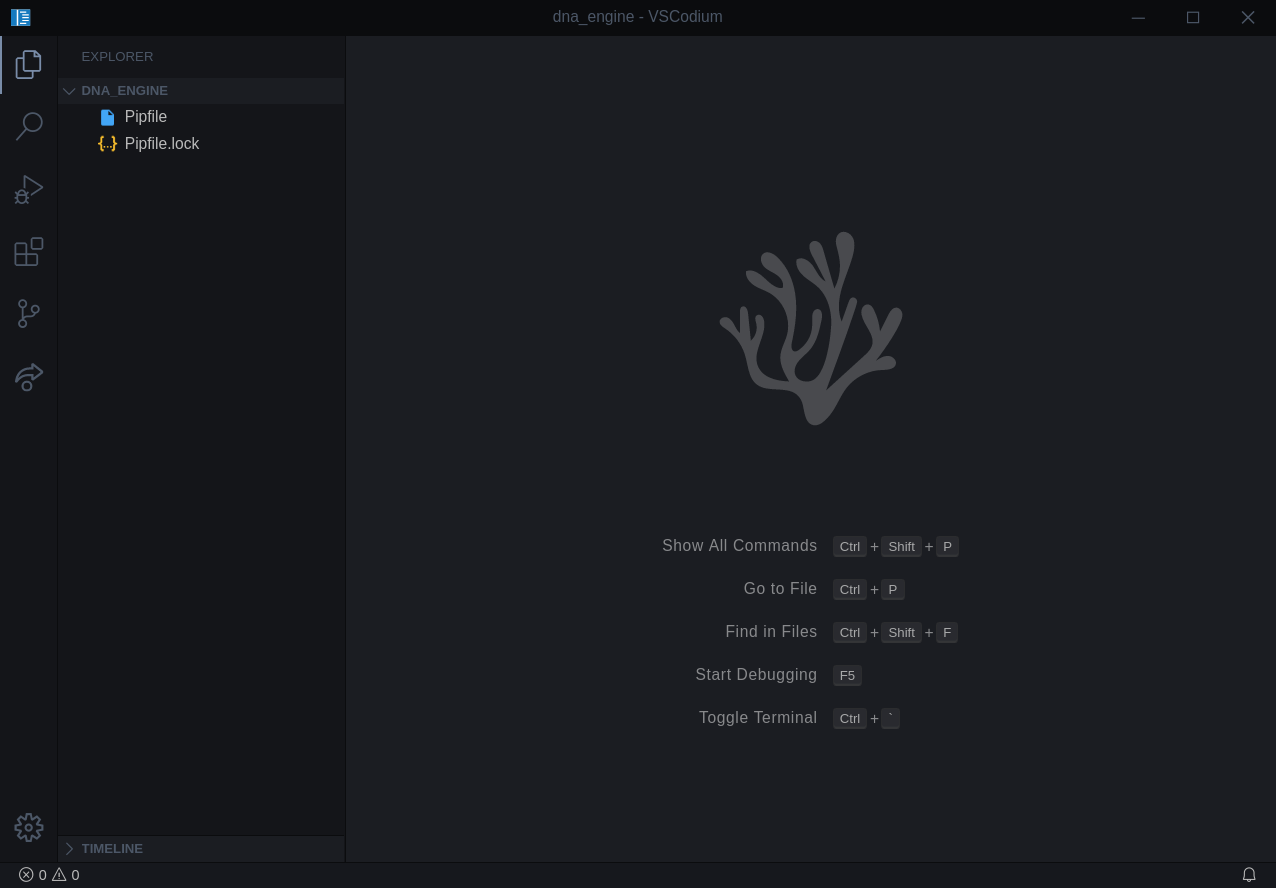
Now we should have something like this (a folder ‘dna_engine‘ and two config files):
Let’s add a new file, called “main.py” and paste a very basic code that will just create a Qt based window:
import sys
from PyQt5.QtWidgets import QApplication, QWidget


if __name__ == '__main__':

    app = QApplication(sys.argv)

    w = QWidget()
    w.resize(250, 150)
    w.move(300, 300)
    w.setWindowTitle('Test Window!')
    w.show()

    sys.exit(app.exec_())
This is what we should have at this point:
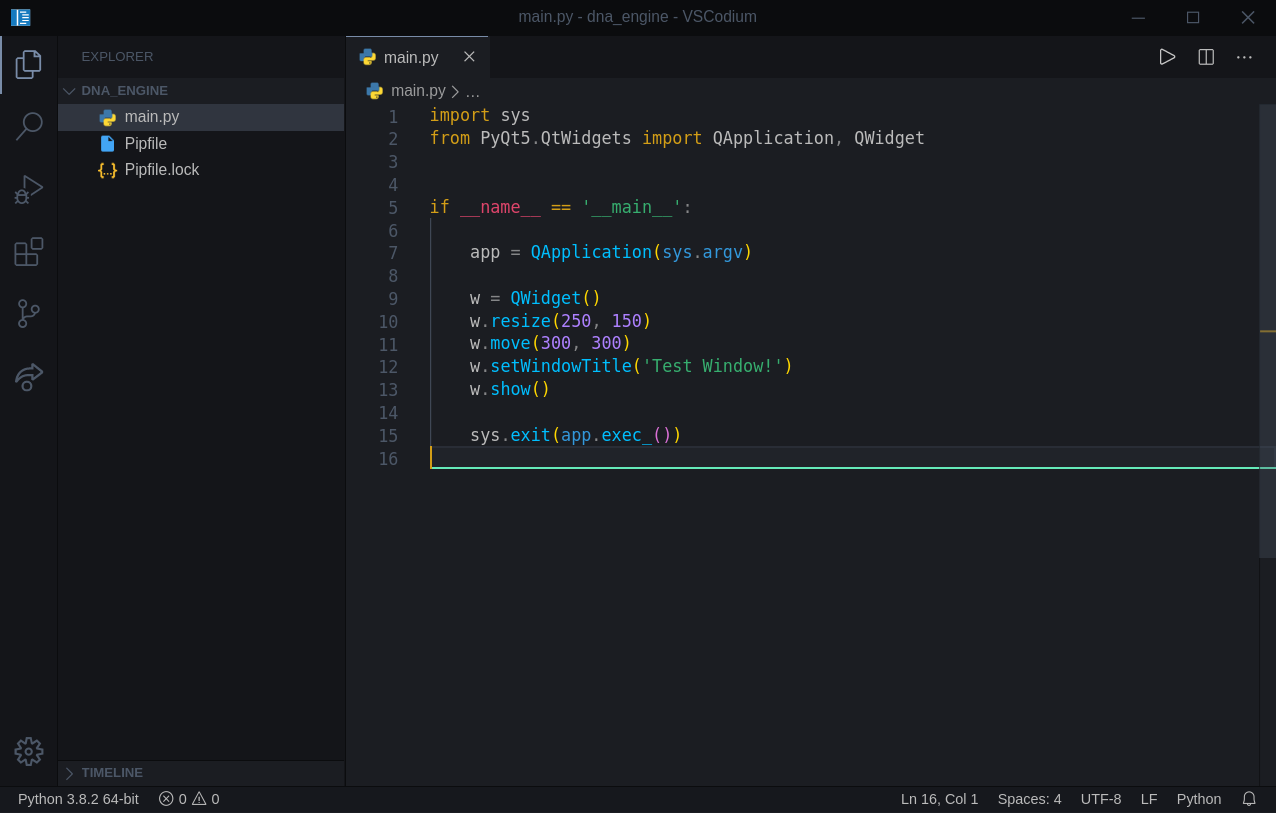
Variable/Method names are very descriptive, and we will not discuss them in here. We need to make sure we have a working project first.
Now, let’s run our project. If you are using the setup I use, described in my dev tools video here, and you have a Code Runner installed (definitely recommended) you can just use “Ctrl + Alt + N” and you should see an empty window pop up:
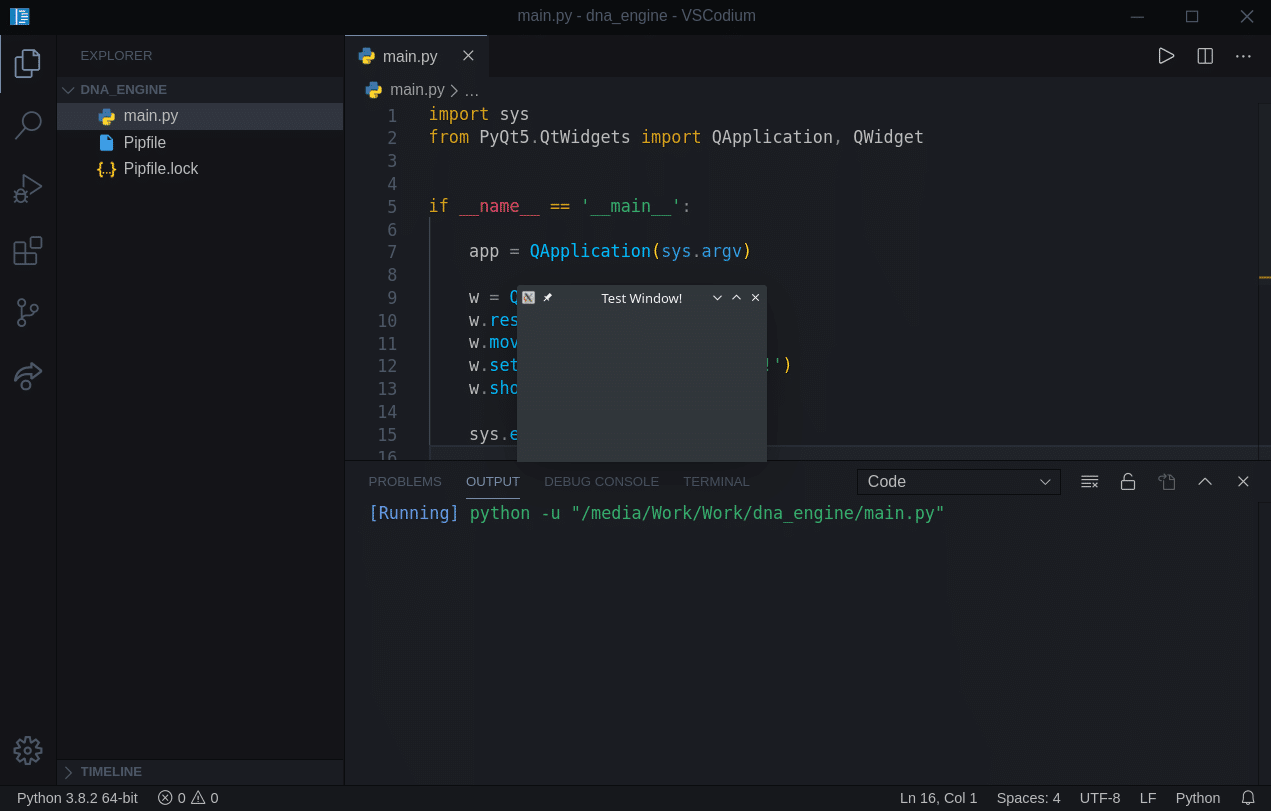
If you see that small window, it means everything is working correctly.
Part 3: Qt Designer
Now let’s take a look at how we can create a UI and use it in our newly created project.
While in ‘dna_engine‘ folder in your terminal, just type ‘designer‘:
(dna_engine) [jurisl@JurisLinuxPC dna_engine]$ designer
NOTE: this works on Linux and should work on the Mac. I will link an additional video at the bottom of this article if you are running Windows. You might need to restart your Windows PC after we installed pyqt5-tools package to make sure Qt Tools folder is in the system path.
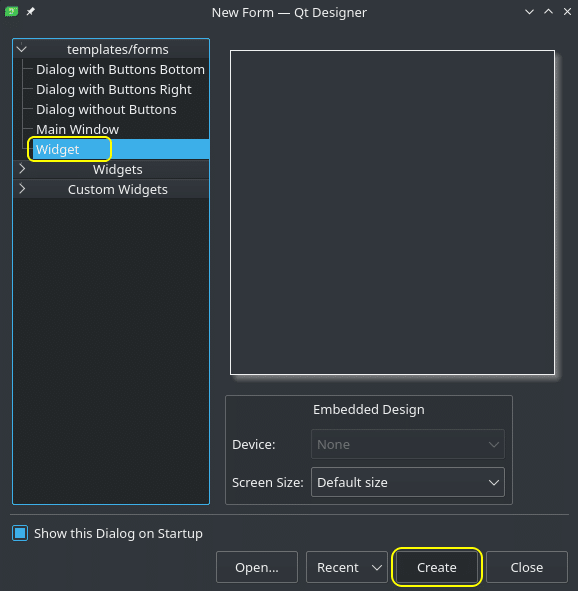
After we execute the above command, we should see ‘New Form‘ window. Select ‘Widget‘ and click ‘Create‘.
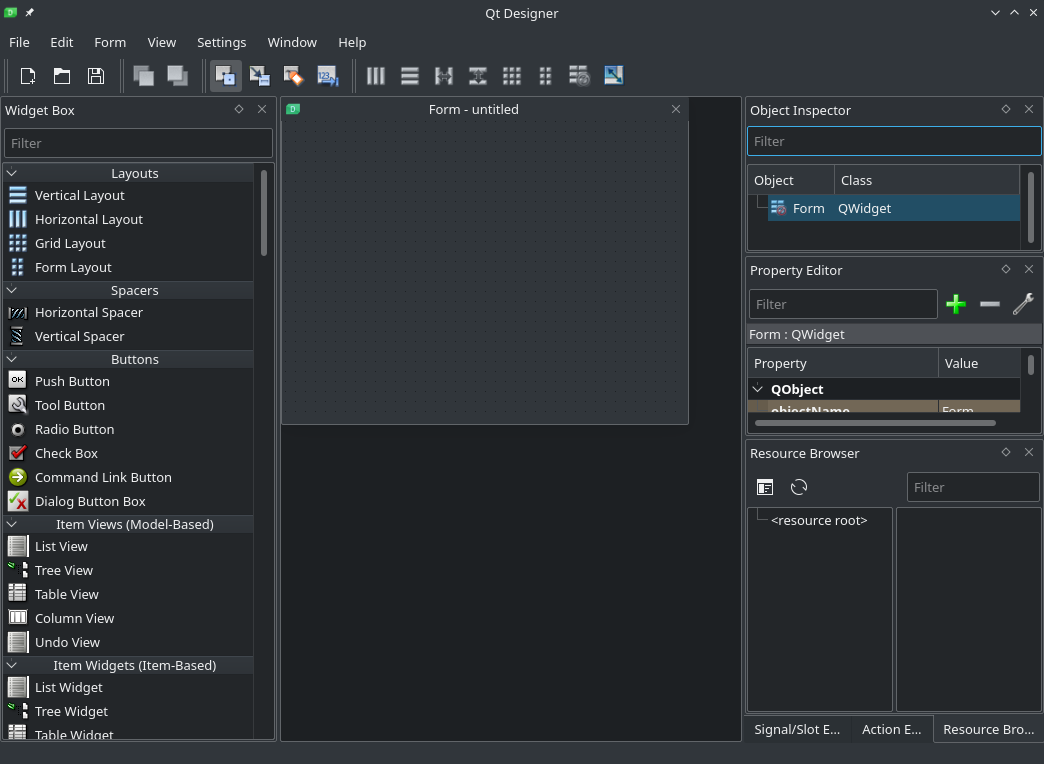
Now we are in the Designer. If you have never worked with UI creation tools like this Designer, don’t worry. You don’t have to understand and learn all of what you see. The basic concept is that we have different elements like buttons, forms, text fields, etc. and every element has a lot of different properties; like name, ID, size, position, etc. By understanding how one element like a Push Button works, using other elements will be easy and intuitive. We will start using and programming elements in our next article/video.
As we can see, the default Designer project is an empty window. Let’s drag-and-drop a few elements from the menu on the left. In my case I will drop a ‘Push Button’, a ‘Check Box’, and a ‘Line Edit’. But you can drop any and as many as you want. Try making the main window smaller:
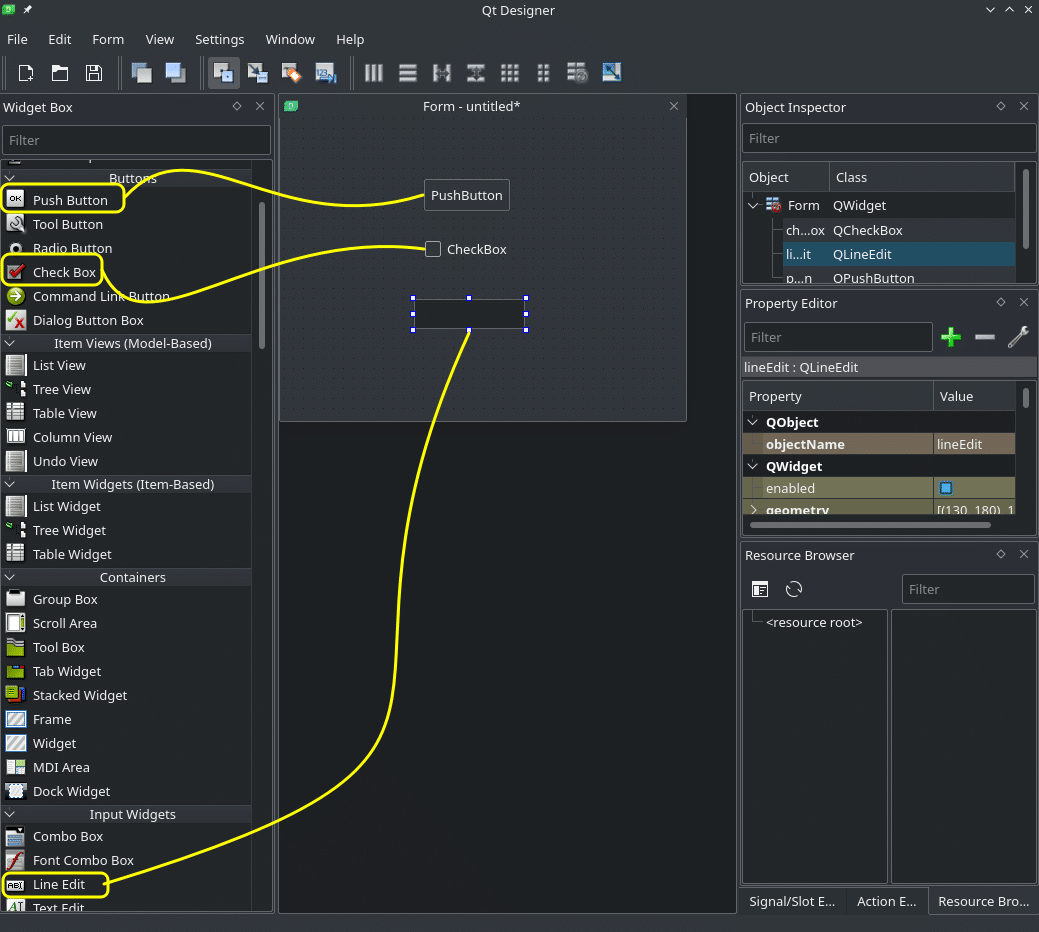
Now you should start getting the feeling of how easy it is to create a user interface like that. It is very intuitive and can also be done by a designer and passed on to a developer to write the actual code.
Save the UI file (File -> Save) in the root directory of our project ‘dna_engine‘ and name it ‘dna_engine.ui‘. This file is in XML format. We will need to convert it to a Python file later.
Now let’s change the code in our ‘main.py‘ file to a class based Qt template. This template will be the basis for our project structure:
import sys
from PyQt5 import QtWidgets as QtW
from PyQt5 import QtCore as QtC
from PyQt5 import QtGui as QtG


class MainWindow(QtW.QWidget):

    def __init__(self, *args, **kwargs):
        super().__init__(*args, **kwargs)
        # Application Logic goes here:

        self.show()


if __name__ == '__main__':
    app = QtW.QApplication(sys.argv)
    window = MainWindow()
    sys.exit(app.exec_())
Nothing really special here. We import a few Qt framework modules, create a MainWindow class, and create an instance of our window/application in the __main__ function. If we run this, we should see exactly the same result as before: an empty window.
Now we need to use one other tool that is a part of pyqt5-tools package, ‘pyuic5‘. It will convert our .ui file into a .py file.
While in your terminal and in a ‘dna_engine‘ folder, type the following command:
pyuic5 dna_engine.ui -o engine_ui.py
- pyuic5 – .ui -> .py converter tool.
- dna_engine.ui – name of the source ui file.
- -o – output.
- engine_ui.py – output file.
You can also execute this command from within your code editor (Ctrl + `) if you are in VSCode) like I did here:
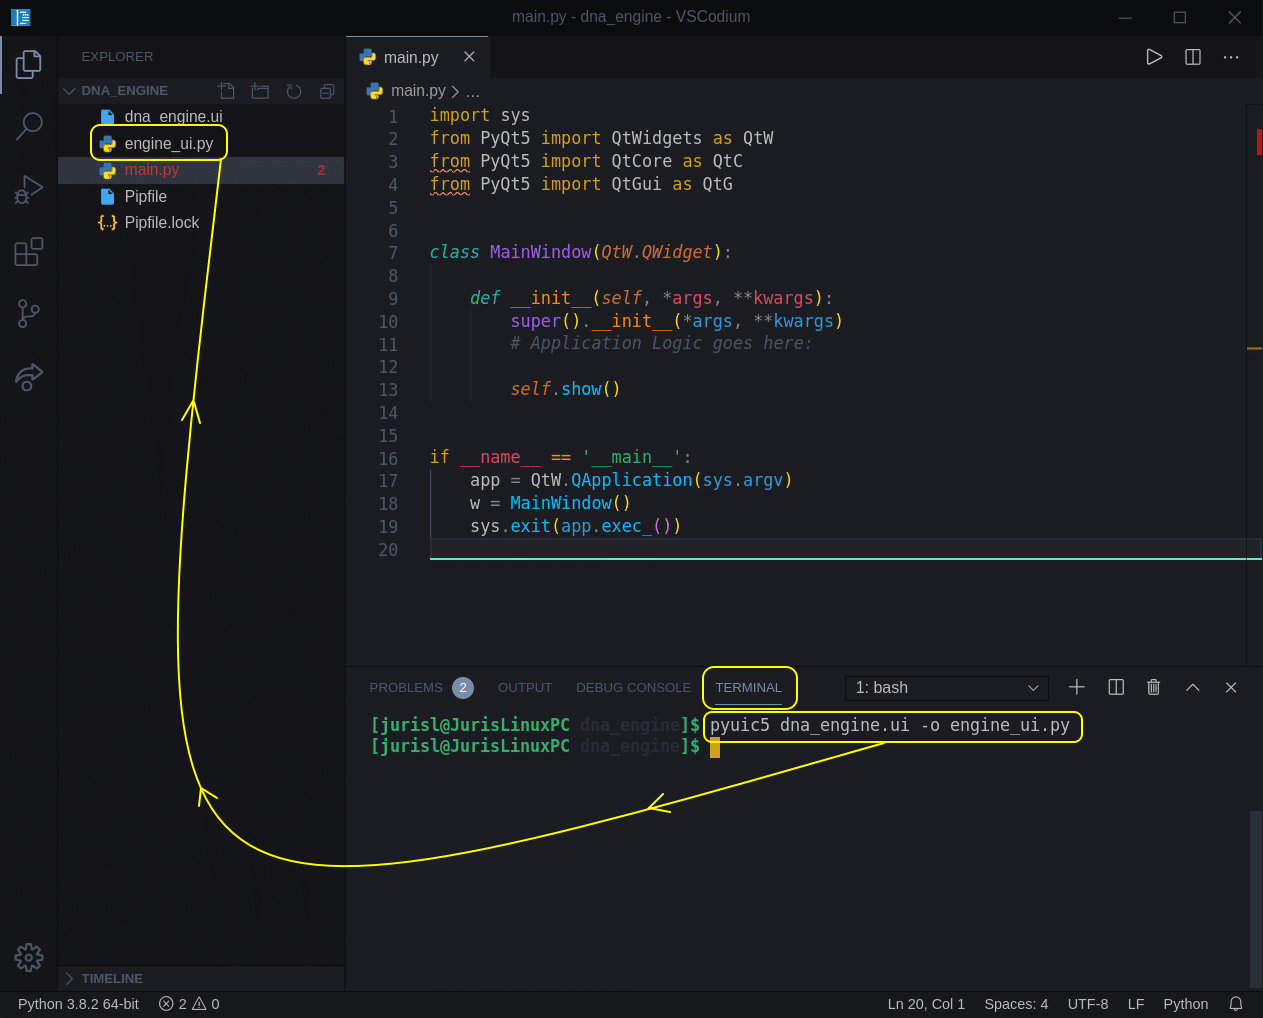
After we have executed this command, we should see a new file added to our project.
Part 4: Loading UI file
Let’s open our new file, pyuic5 tool generated for us in the previous segment and see what’s inside.
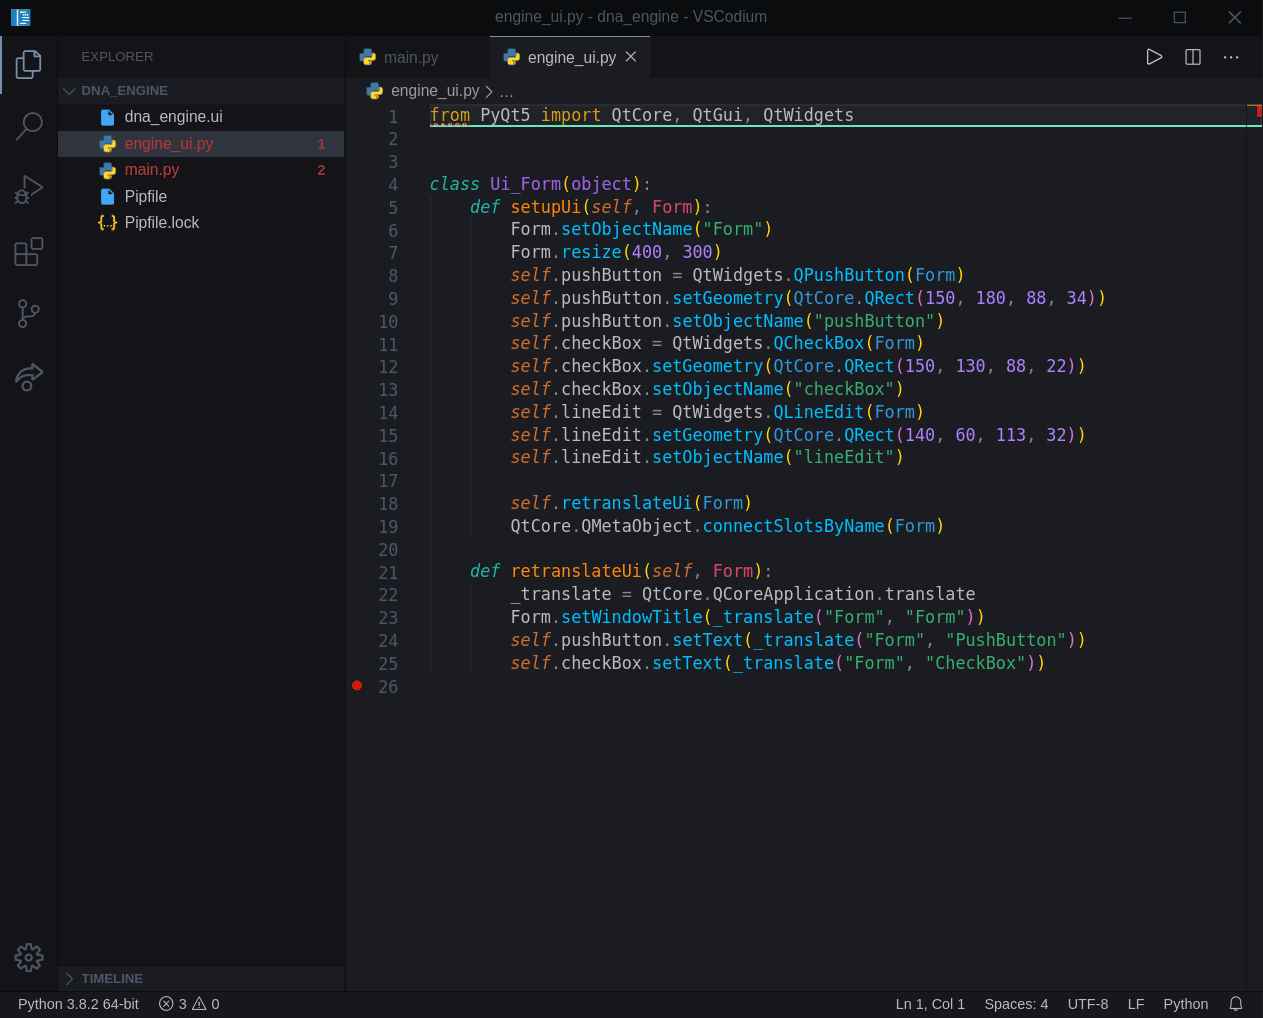
Well, we see that is just a simple class that utilizes Qt framework, and it contains elements we added to our form and some additional properties associated with those elements.
While this file looks nice and clean, this might and probably will grow in size and complexity significantly. But as we will import this file into our main project and just access the elements, that is not a problem. Our main application code will “live” separately from this file. This way we can also keep modifying and regenerating this ui file, while we keep developing the core of our application. Remember, application code is separate from our UI file. This will become more clear when we start working on our project file/class structure.
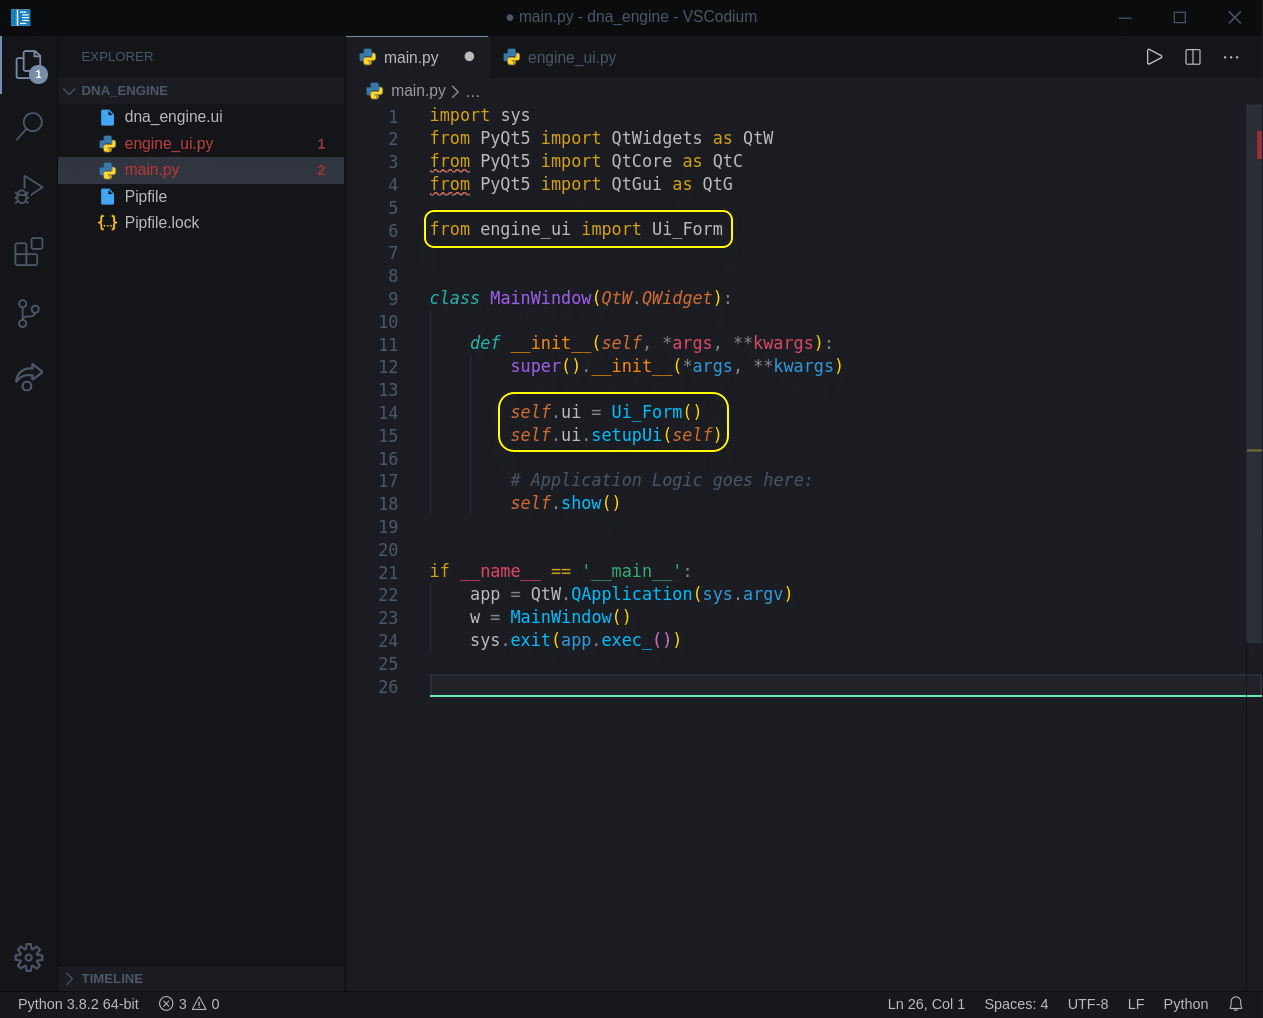
Now let’s add just 3 lines of code and load that UI we have created:
import sys
from PyQt5 import QtWidgets as QtW
from PyQt5 import QtCore as QtC
from PyQt5 import QtGui as QtG

from engine_ui import Ui_Form


class MainWindow(QtW.QWidget):

    def __init__(self, *args, **kwargs):
        super().__init__(*args, **kwargs)

        self.ui = Ui_Form()
        self.ui.setupUi(self)
        # Application Logic goes here:

        self.show()


if __name__ == '__main__':
    app = QtW.QApplication(sys.argv)
    window = MainWindow()
sys.exit(app.exec_())- Line 6 – importing Ui_Form class from our ui file.
- Line 14 – creating a ui class instance (will be used throughout the application).
- Line 15 – calling a setup method of a ui class.
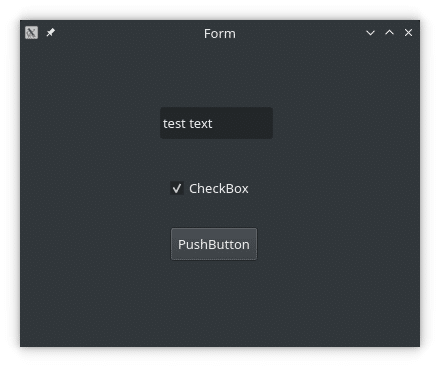
Now if we run our project (Ctrl + Alt + N), we will see our mock-up window:
Conclusion
In this article, we:
- Configured PyQt and PyQt Tools.
- Tested our configuration with a test app/window.
- Used Designer to create a test window with a few elements.
- Loaded the ui file into our project.
In our next article, we will start creating a structure for our project, and organize files and class. I also have a ‘From Python to Rust‘ series, where we port some of our bioinformatics code to Rust, and these two series will converge at some point as we will add a ‘Rust Plugin System’ to our DNA Engine. This will enable us to extend DNA Engine functionality by writing computationally heavy code in Rust and add it as a plugin.
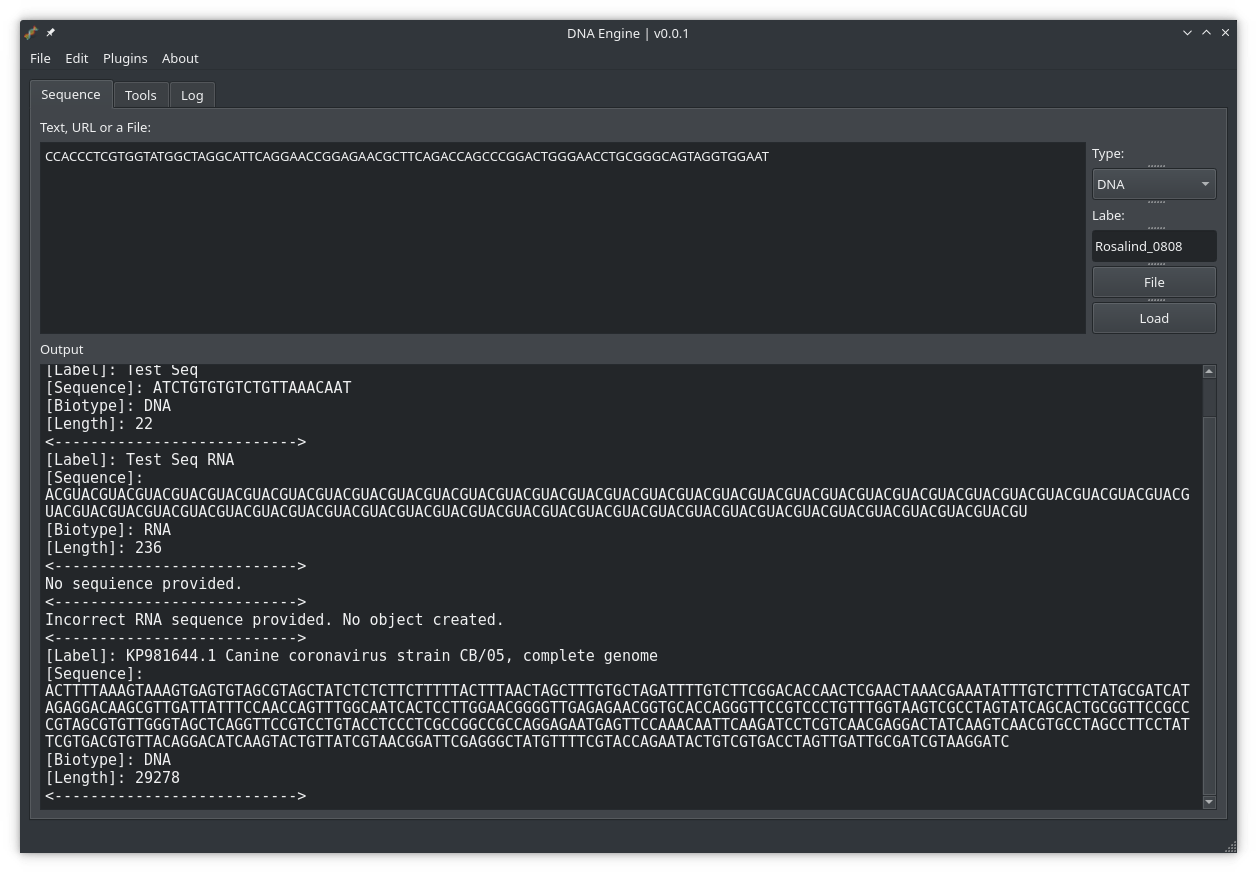
Example of what the first version of DNA Engine might look like, utilizing the DNA Toolkit:
Links:
- PyQT5 + Designer installation and use on Windows Video.
- Alan D Moore’s amazing PyQT and Designer Video.
Also, not required but a highly recommended book by Alan D Moore:
Buy: US / UK
GitLab: https://gitlab.com/RebelCoder/dna-engine-toolkit.git
Video version of this article:
Video version:
One thought on “Bioinformatics Tools Programming in Python with Qt. Part 1.”