In our “dna_toolkit” series, we used Python Strings, Lists, and Dictionaries extensively. These data structures are very useful and make our life very easy. Let’s see what Rust has to offer.
We start with Strings. Rust has two types. One, called ‘String slice’, and the other one is more like a string in other languages, which is just ‘String’. I am going to link to an amazing video about Strings in Rust in the ‘Links’ section below. Please make sure to watch it if you are completely new to this part of Rust.
In this article, we will focus on looking at how we can use Strings in Rust to replicate some of our ‘dna_toolkit’ code. In a previous article, we created two files for Rust and Python: ‘main.rs‘ and ‘main.py‘ respectively. We added all the code into those two files.
To avoid adding a lot of code into one file, let’s create separate files for each video, wrap the code into functions and include/import them into our ‘main‘ files.
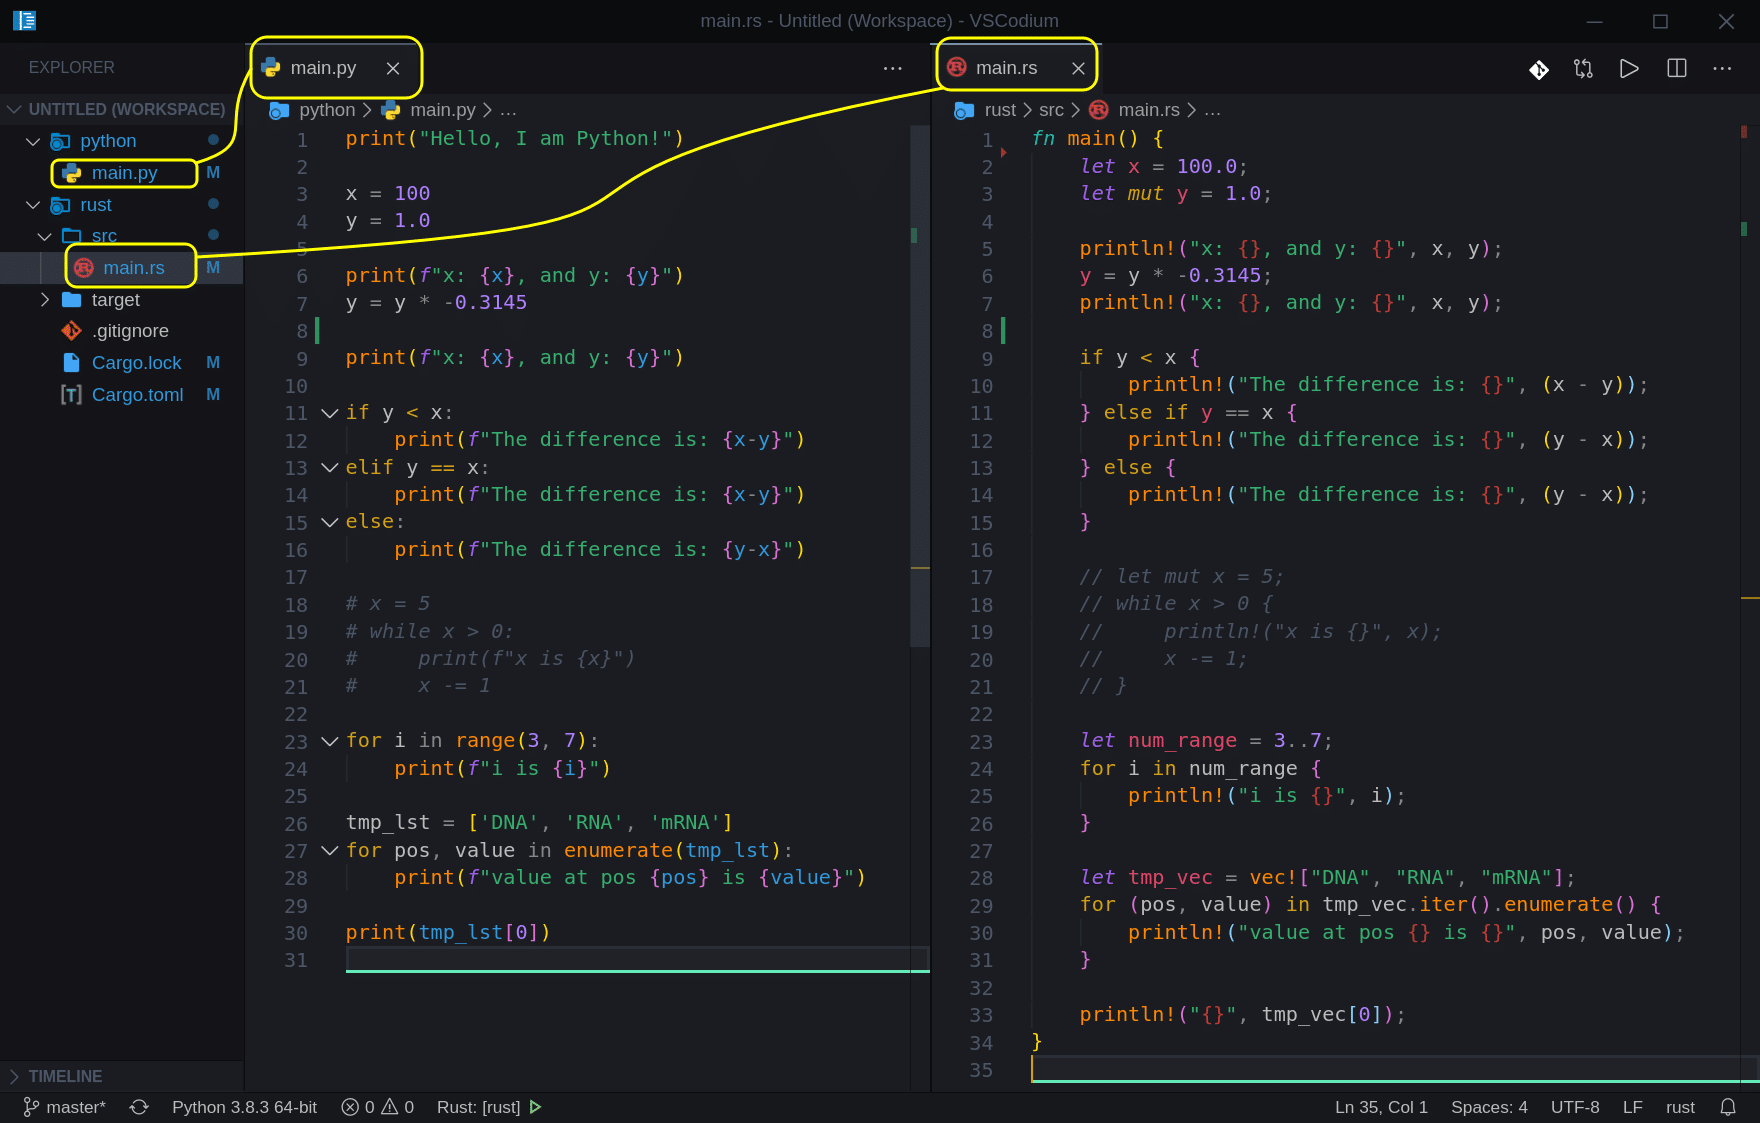
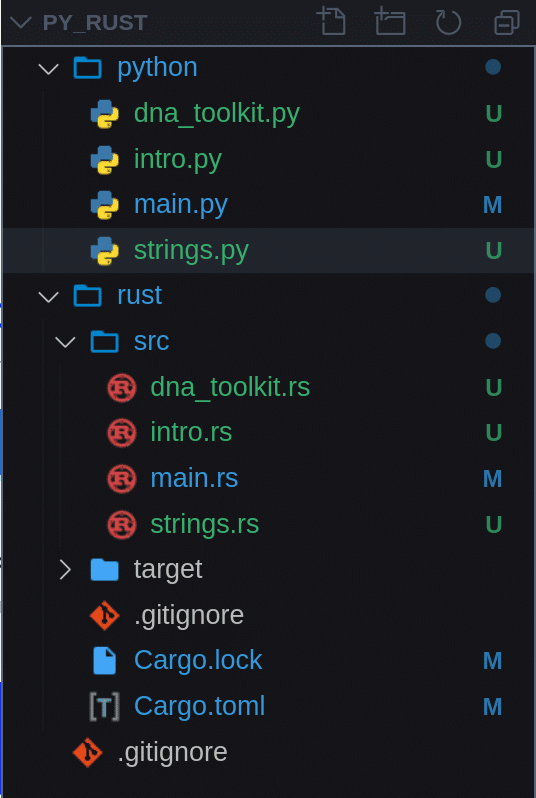
So here is the project structure we created in our first article:
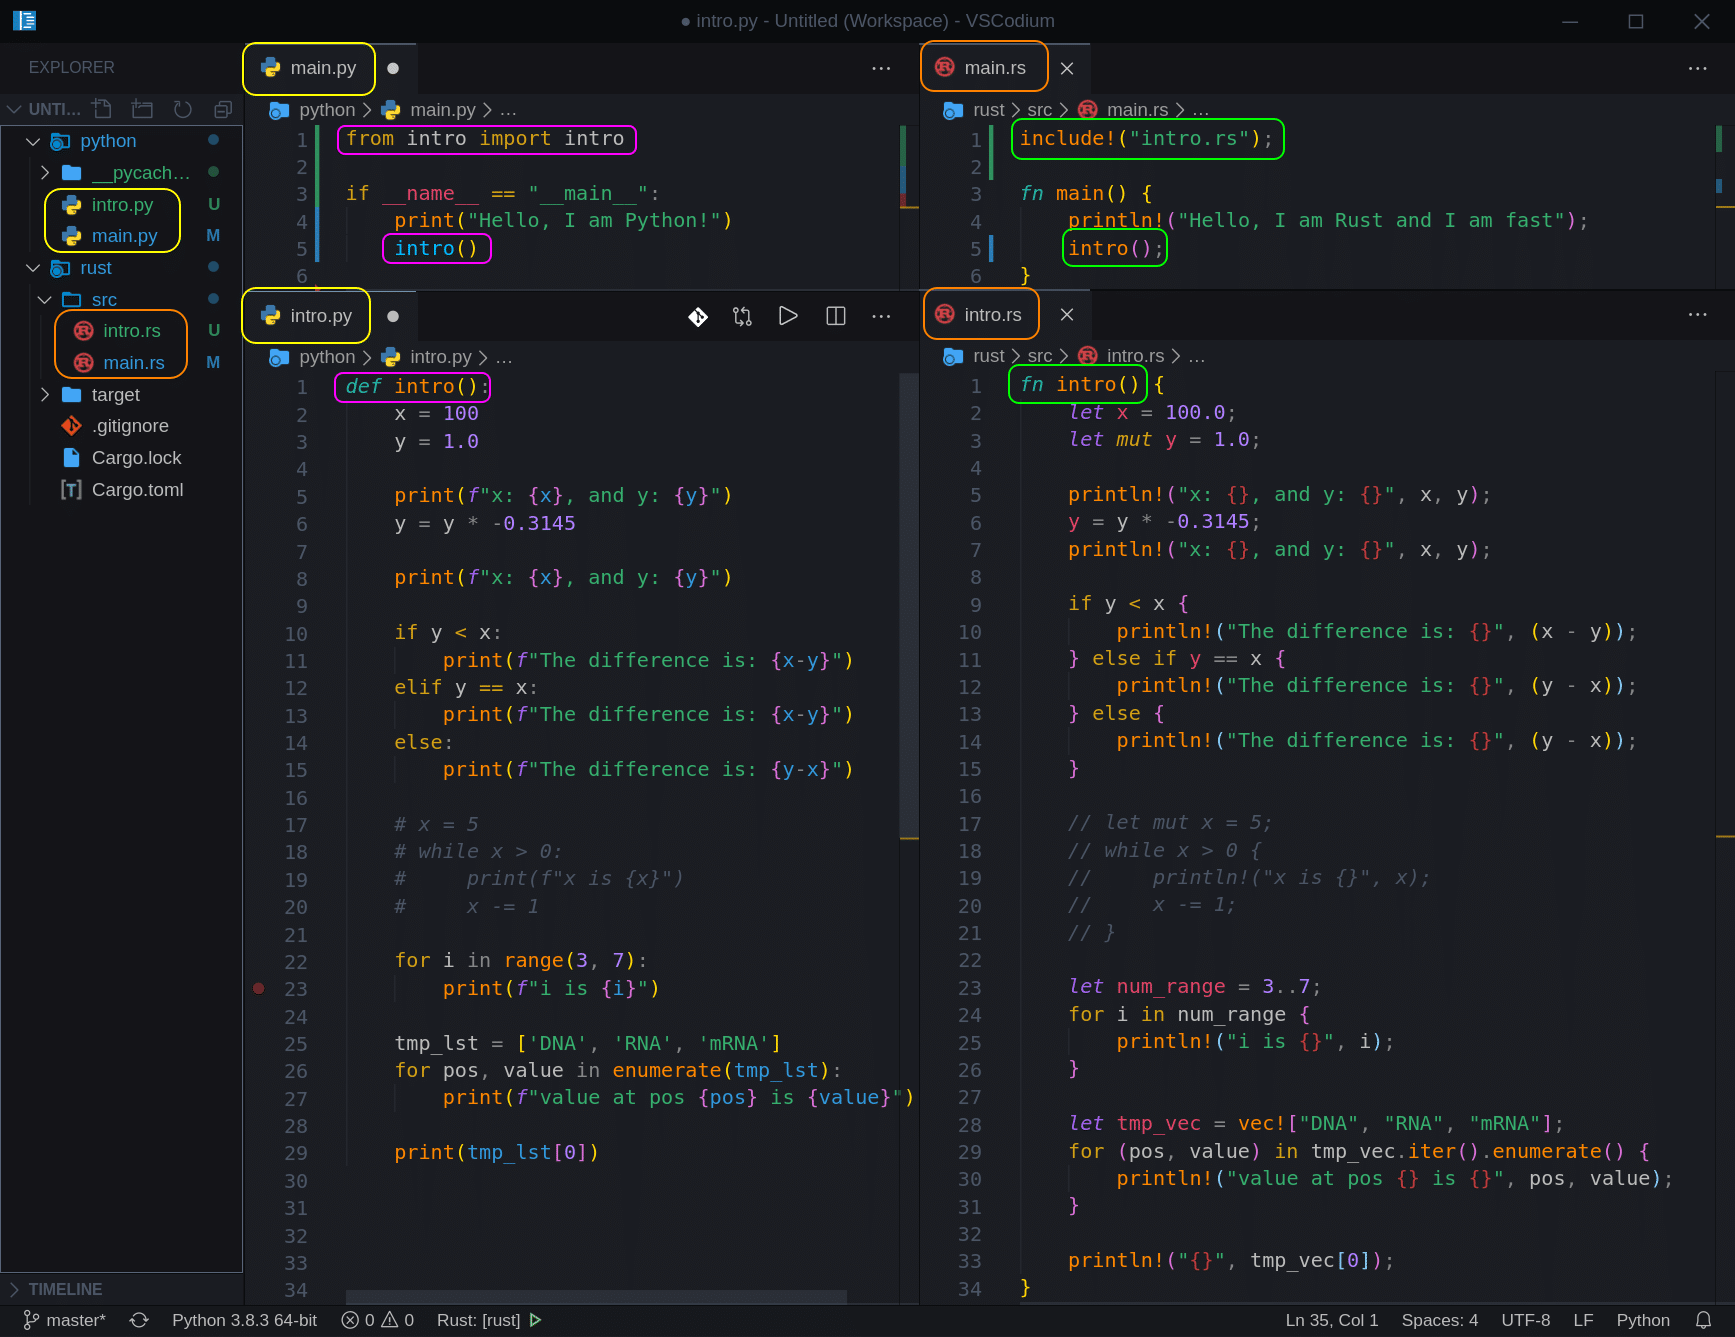
Let’s create two new files; ‘intro.py‘ and ‘intro.rs‘, move all the code from our ‘main‘ files into those files, and include/import them. So now our project should look like this:
Now that we have established the structure we will use, let’s add two more files called ‘strings‘ and proceed to our first segment.
Part 1: Strings
So now we should have something like this:
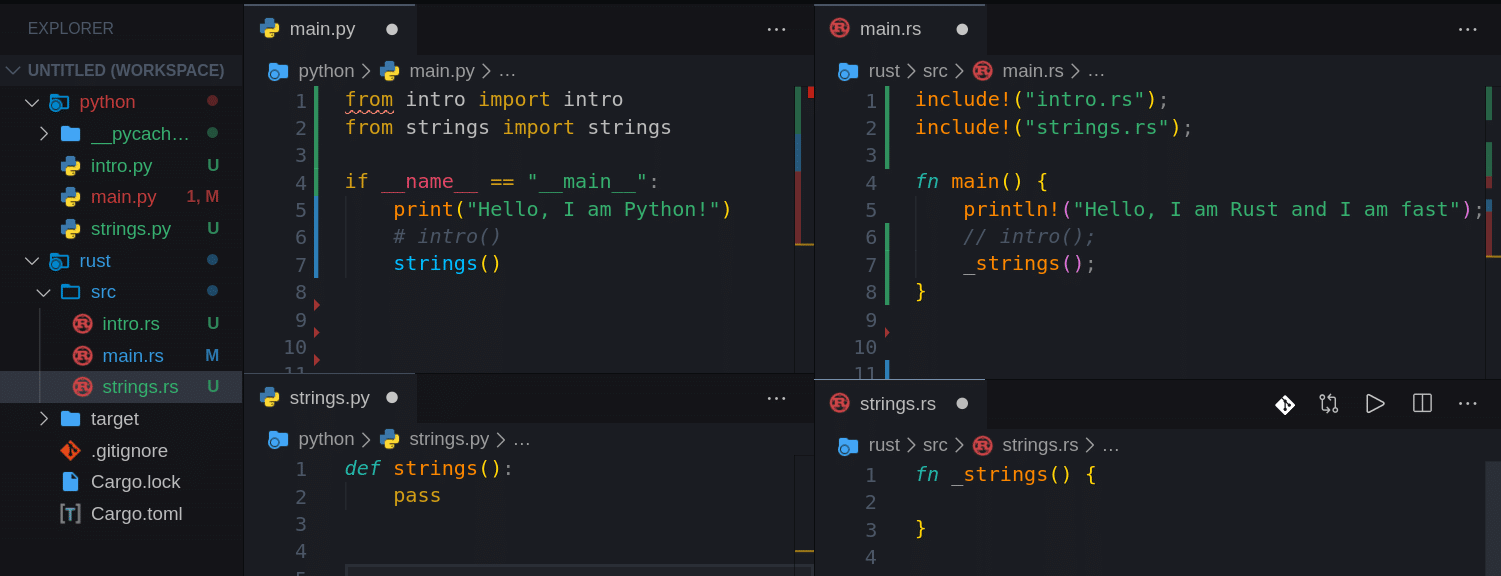
Note, that we added the underscore symbol to our Rust functions: _intro(), _strings(). This is to avoid this compiler warning message:
<strong>= note: `#[warn(dead_code)]` on by default</strong>
We will comment out calls to previous functions to avoid a lot of output at the same time, so we can focus only on the output of the current article code. In this case, Rust tells us that there is a ‘dead code’, meaning we have a function _intro() that is included but never called. This is not a problem, just remember to add underscore to all Rust functions that you are not using/calling.
We will focus on a String as it is a heap allocated data structure, meaning we can change it during the runtime, and it has a set of very useful methods.
test_str = "Doom"
print(test_str)

test_str += " III"
print(test_str)

test_str += '!'
print(test_str)
let mut test_str = String::from("Doom");
println!("{}", test_str);

test_str.push_str(" III");
println!("{}", test_str);

test_str.push('!');
println!("{}", test_str);
Python doesn’t care if you add a ‘character’ or another “String” to our main string, but Rust is strict about it. Here we have two Rust methods for:
- push_str(” “); – adds a string. Requires double quotes ” “. Line 4.
- push(‘ ‘); – adds a single character. Requires single quotes ‘ ‘. Line 7.
If in Python we just saytest_str = "Doom" and Python can understand it is a string, in Rust we need to tell the compiler explicitly: let mut test_str = String::from("Doom");
You can also create an empty String like this:let mut test_str = String::new();
Both codes will output this:
Doom
Doom III
Doom III!
Check out a few other methods Rust String has : https://www.tutorialspoint.com/rust/rust_string.htm
Let’s combine two existing strings:
p1 = "Duke"
p2 = " Nukem"

p3 = p1 + p2
print(f"{p1} {p2} {p3}")
This is easy in Python. It just works, and we can keep accessing all three variables after we run this code.
If we attempt to do the same in Rust, we will run into an issue. Let’s take a look:
let p1 = String::from("Duke");
let p2 = String::from(" Nukem");

let p3 = p1 + &p2;
println!("{} {} {}", p1, p2, p3) // Will generate an error
Note, that when we add strings, the first string does not have ampersand & symbol. Every string we add after that has to have & symbol.
If we run this, we will see this issue:
<strong>println!("{} {} {}", p1, p2, p3);
                   | ^^ value borrowed here after move</strong>
On the line 4 we gave the ownership of p1 to p3, and we attempt to access it again on the line 5, by printing it out. p1 does not exist at this point, as the ownership has been transferred to p3.
We need to use Rust’s ‘format!‘ function, which will ‘borrow’ p1, and p2 memory locations to construct p3 and will not affect ownership of any variable:
let p1 = String::from("Duke");
let p2 = String::from(" Nukem");

let p3 = String::from(format!("{} {}", p1, p2));
println!("{} {} {}", p1, p2, p3);
Now we have replicated Python’s behavior. Both should output this:
Duke Nukem Duke Nuke
Now, let’s take a quick look at how we can print out individual characters, indices, and part of the string (a slice):
# Print each character:
for ch in p3:
    print(ch)

# Print each character and it's index:
for pos, ch in enumerate(p3):
    print(pos, ch)

# Print a slice of the string
print(p3[0:5])
for ch in p3.chars() {
println!("{}", ch);
}
for (ind, ch) in p3.char_indices() {
println!("{} - {}", ind, ch);
}
println!("{}", &p3[0..5]);The code looks very similar as you can see. In Rust, we use the chars() method to get a single character and char_indices() to get an index and a character. Slicing is almost identical.
Part 2: Rand module (crate)
Now that we are armed with basic Rust String knowledge, let’s quickly port two “DNA Toolkit” functions. For that, we will need to use a random number generator. Random module is a part of Python and can just be included and used, but in Rust we need to add it as a dependence, build it, and only then we can use it. But this is super easy, as you will see.
Project dependencies configuration can be found in Cargo.toml file:
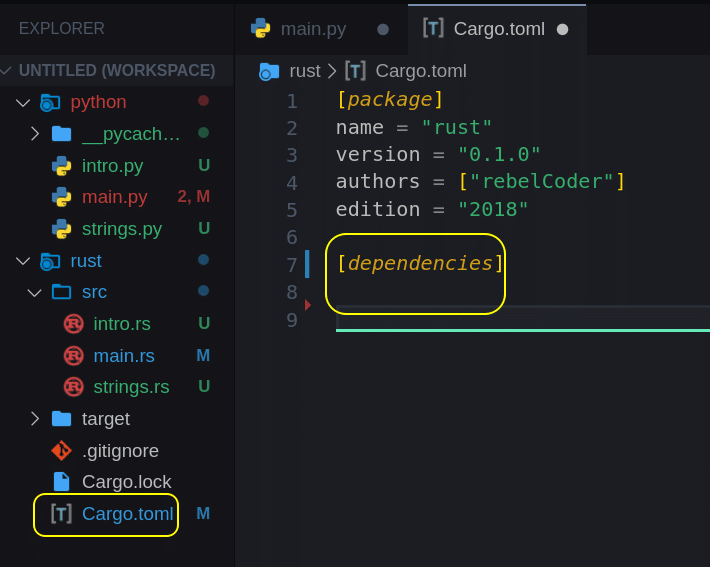
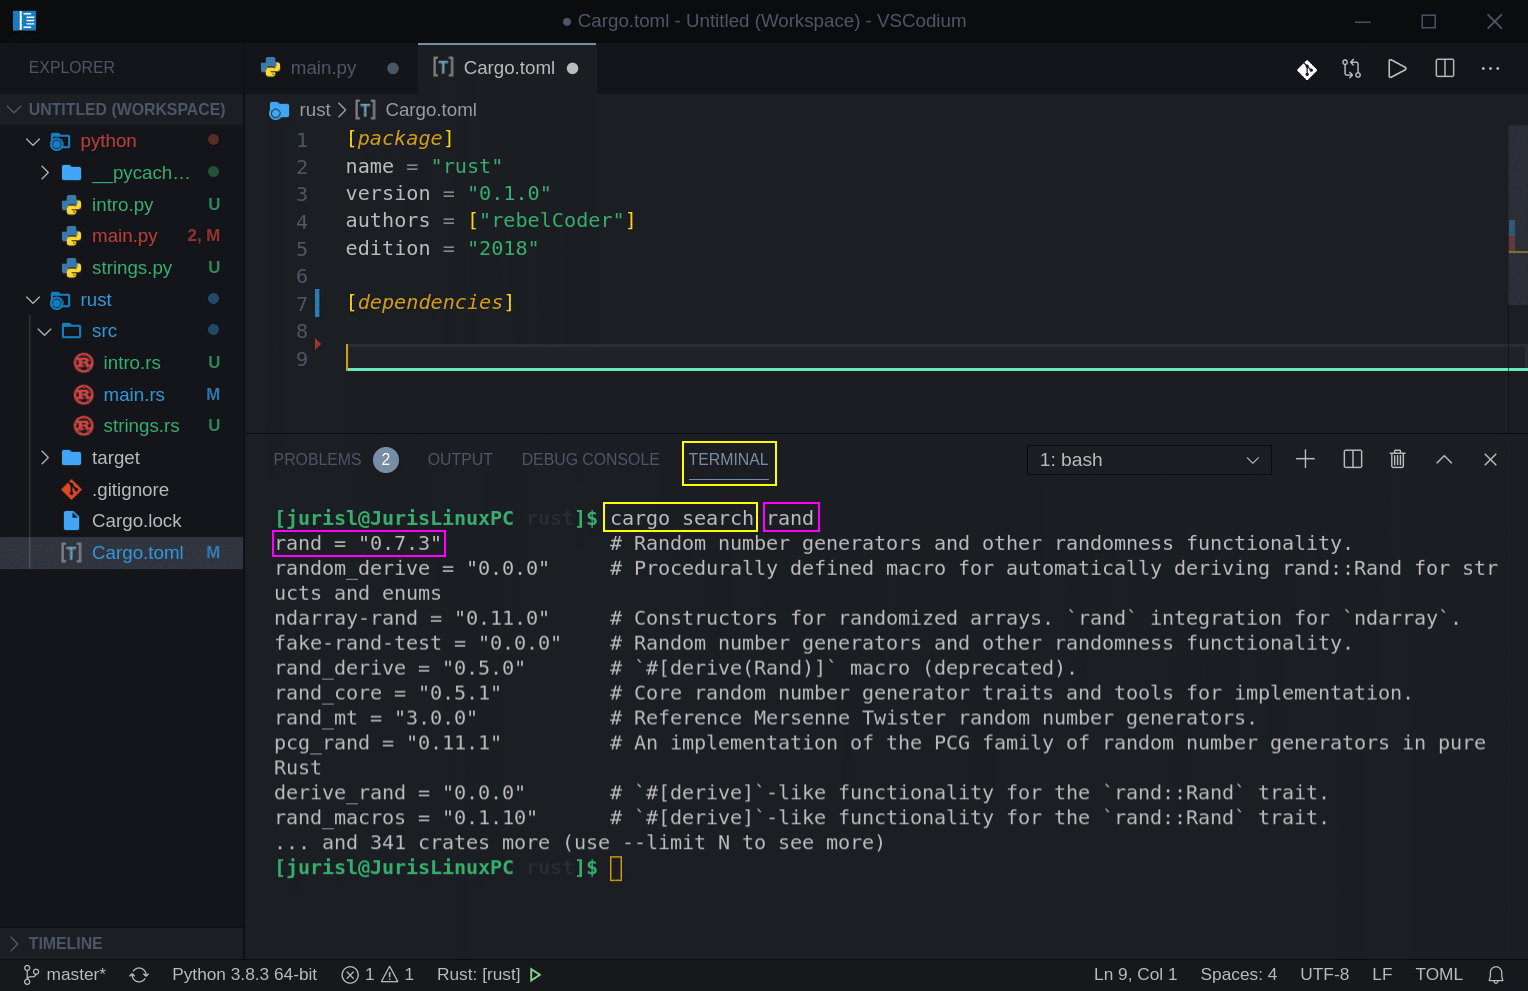
Before we just blindly add a module, let’s see how we can search for it. Open your terminal, make sure it is in ‘dna_engine’ folder, or use the built-in terminal and execute cargo search to search for rand module (crate).
cargo search rand
We can see we found the module we need:
Now let’s add it to our project. Modify Cargo.toml file Line 7-8 to look like this:
[dependencies]
rand = "0.7"
That’s it. When we finish writing a function (next segment) that will need this module, and run that function, Rust will see that we are trying to use this module. It will see we have added it to [dependencies] and download/build it for us.
Part 3: Random DNA sequence generation
Let’s add two new files: dna_toolkit.py and dna_toolkit.rs. This is where our two new function will live.
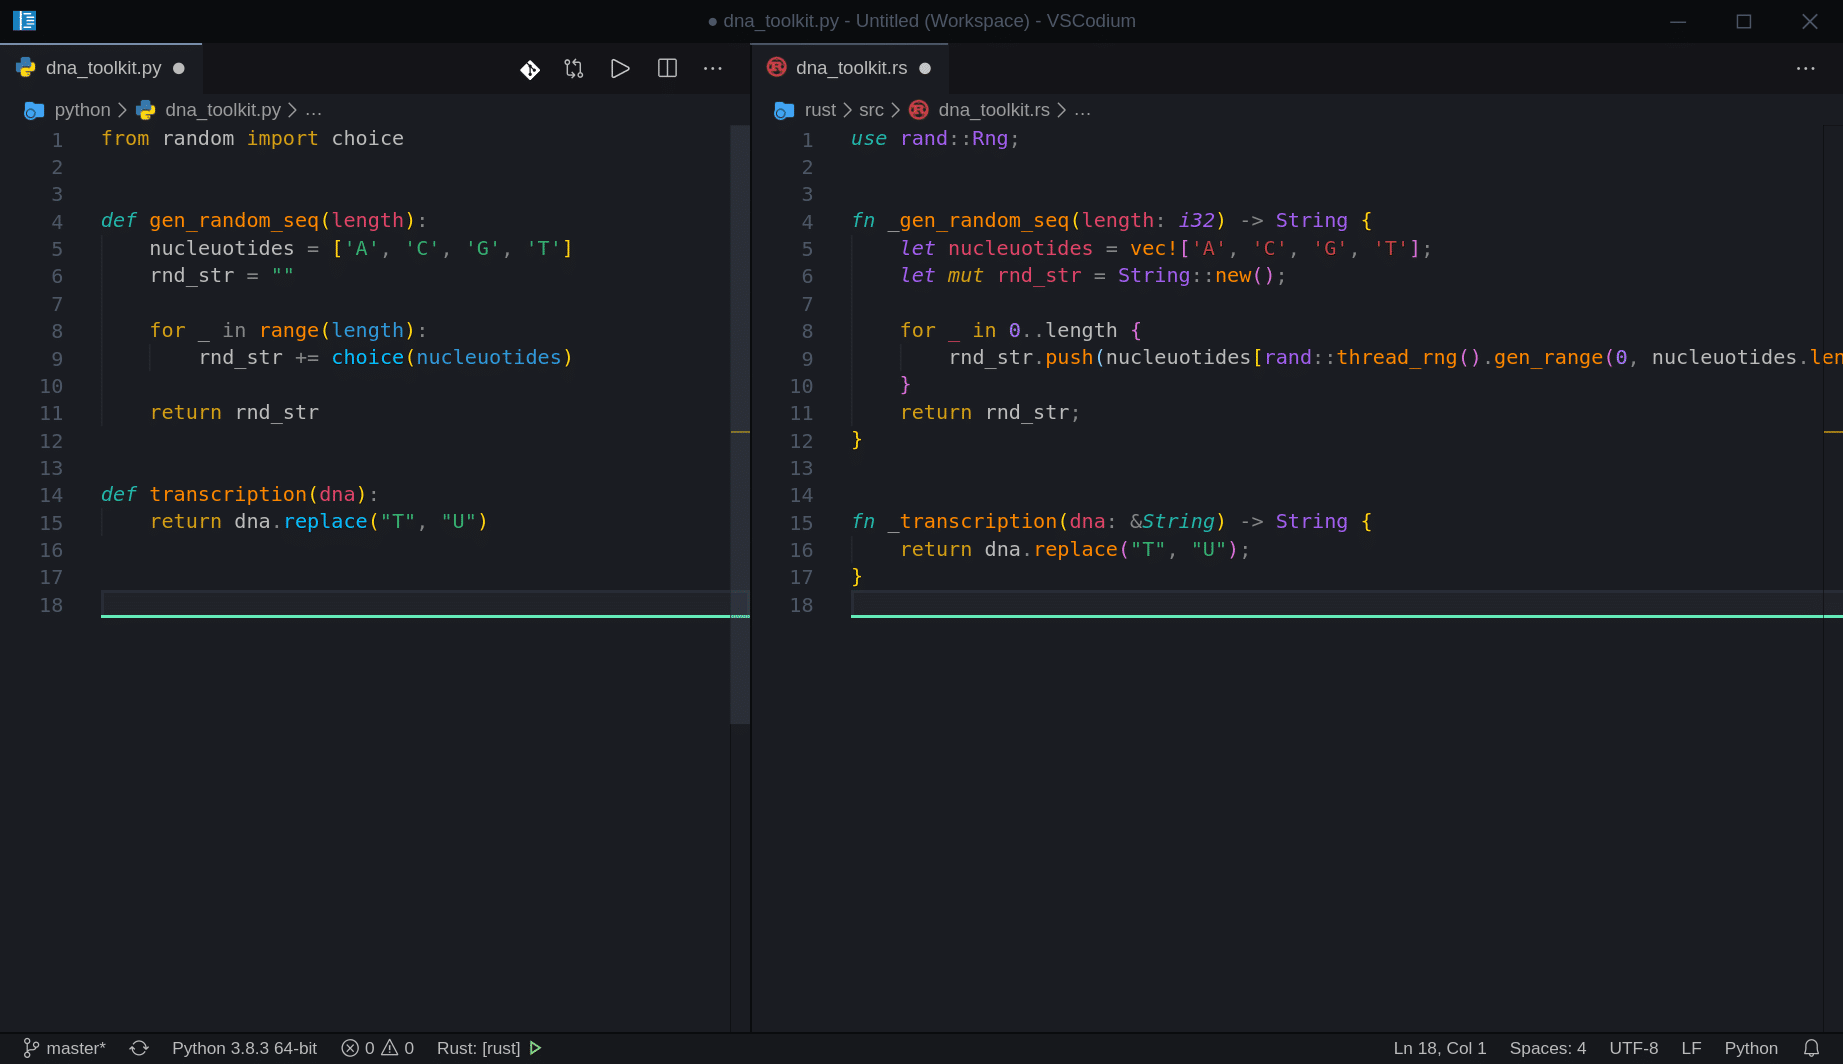
So here is our random DNA sequence generation function: (we use a loop in Python instead of list comprehension for demonstration purpose)
from random import choice

def gen_random_seq(length):
    nucleuotides = ['A', 'C', 'G', 'T']
    rnd_str = ""

    for _ in range(length):
        rnd_str += choice(nucleuotides)

    return rnd_str
use rand::Rng;
fn _gen_random_seq(length: i32) -> String {
let nucleuotides = vec!['A', 'C', 'G', 'T'];
let mut rnd_str = String::new();
for _ in 0..length {
rnd_str.push(nucleuotides[rand::thread_rng().gen_range(0, nucleuotides.len())]);
}
return rnd_str;
}The structure is very similar.
- Line 1: We import/include random modules. choice/rand.
- Line 3: While in Python we don’t have to specify the type of the parameter and a return type, in Rust we need to do that.
length: i32tells the compiler we will be passing an integer to our function, and-> Stringpart tells the compiler we will be returning a String. - Line 8: Python code definitely looks cleaner, but Rust is not much harder to read. We are just asking the
randmodule to generate a random number in range from0to thelengthof the vector that has 4 nucleotide character in it. Wepushthat randomly picked character onto our string. The only extra bit we have here isthread_rng(). As per Rust documentation: “Retrieve the lazily-initialized thread-local random number generator, seeded by the system“
Part 4: DNA to RNA transcription
In transcription, we just need to replace all ‘T’ – thymine nucleotides with ‘U’ – uracil. This is done with just one line of code in each, as Python and Rust have built-in functions for that:
def transcription(dna):
    return dna.replace("T", "U")
fn _transcription(dna: &String) -> String {
return dna.replace("T", "U");
}Easy, right? Now let’s look at both files side by side:
And let’s try adding the output to our main files to test our new functions:
from intro import intro
from strings import strings
from dna_toolkit import gen_random_seq, transcription
if __name__ == "__main__":
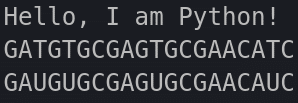
print("Hello, I am Python!")
# intro()
# strings()
dna = gen_random_seq(20)
print(dna)
print(transcription(dna))include!("intro.rs");
include!("strings.rs");
include!("dna_toolkit.rs");
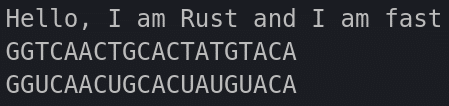
fn main() {
println!("Hello, I am Rust and I am fast");
// intro();
// _strings();
let dna = String::from(_gen_random_seq(20));
println!("{}", &dna);
println!("{}", _transcription(&dna));
}And here are the outputs from both:
And here is how our file structure should look like so far:
That’s it for this article. Now we know how to create and manipulate Strings in Rust. How to write a simple function, pass a parameter to it and return a value. We also learned how to add a module (crate) to Rust and include files into other files.
Links
- Rust String video: https://youtu.be/ClPrjjHmo2Y
- Additional Rust String methods: https://www.tutorialspoint.com/rust/rust_string.htm
Recommended Rust programming book:

(UK / US)
GitHub: https://github.com/rebelC0der/From_Python_To_Rust
Video version of the article:
One thought on “From Python to Rust: Part 2.”